How to remove an image background and create a transparent PNG with Canva
A step-by-step tutorial to remove the background with Canva and create professional transparent PNGs: logos, products, social. Tips, alternatives and how to organise the asset library.
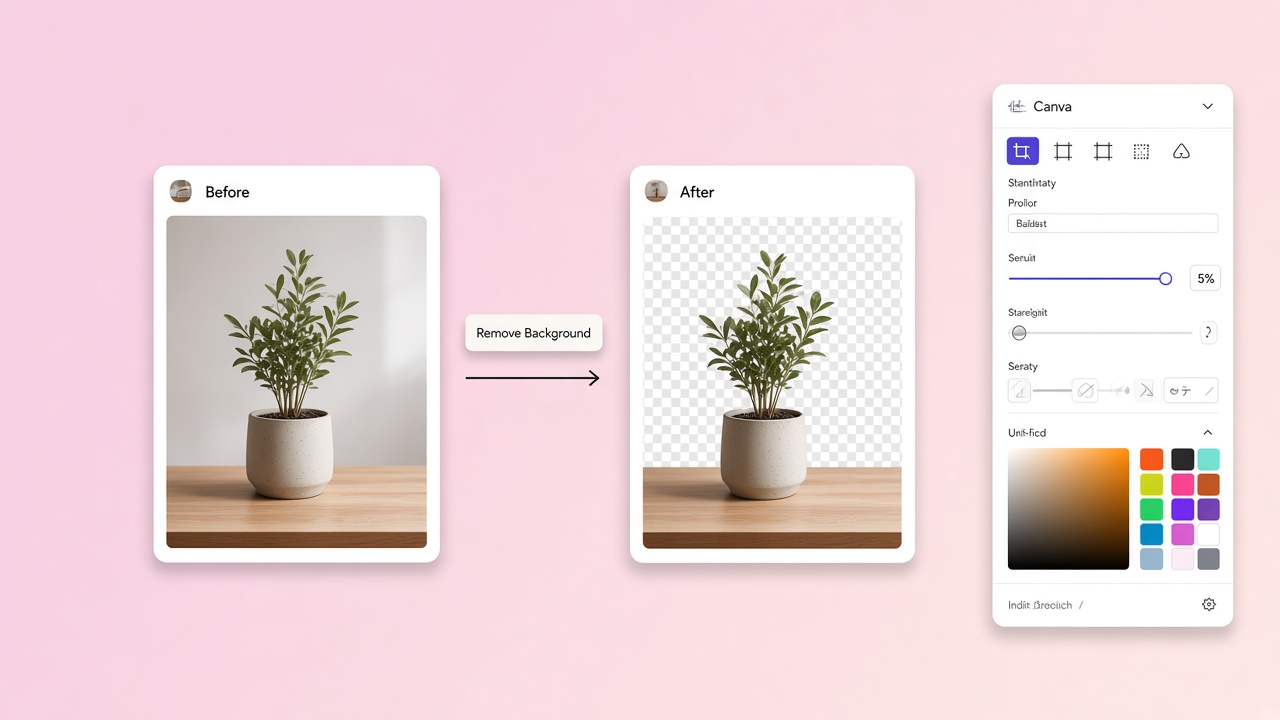
How many times has it happened to you to have a perfect photo… ruined by a horrible background?
It always happens: a logo on a white background that does not look good everywhere, a product photo with a chaotic background, a beautiful portrait but impossible to use in a clean layout.
The solution is to create a PNG image with a transparent background: a file that you can use anywhere, on top of any colour or graphic, without strange borders or white frames.
In this guide we look at:
- why a transparent PNG is so important for brands, e-commerce and content creators
- the difference between PNG and JPG
- how to remove the background online in a simple way using Canva
- some practical examples of use
Why a transparent background is so useful
Having a transparent PNG image lets you:
- Use your logo everywhere
On a light background, a dark one, images, patterns… without problems of white frames or colours that clash. - Obtain more professional product photos
You can put the product on a neutral, coloured or branded background, without having to redo the shots every time. - Create flexible graphics for social and ads
You can combine people, objects and texts on different layouts, simply by overlaying transparent PNGs. - Keep visual consistency
The same element (logo, icon, product) can live in a thousand different contexts, but always stay recognisable.
In practice: once you start using transparent PNGs in a systematic way, your brand and your graphics become much cleaner and more professional.
PNG vs JPG: what really changes
Simplifying:
- JPG
- compresses the image a lot (to occupy less space)
- is perfect for “full” photos (e.g. landscapes, generic photos)
- does not support transparency: you will always have a background (white, black, coloured…)
- PNG
- keeps more quality (lossless compression)
- ideal for logos, icons, graphic elements, texts
- supports transparent or semi-transparent backgrounds
That is why, if you want to remove the background and have a “cut-out” element to use everywhere, you must work in a transparent PNG, not in JPG.
How to remove the background with Canva and create a transparent PNG
To create a transparent PNG in a simple way, you can use Canva’s PNG maker tool.
1. Open the right tool
Go to the site: Create a transparent PNG
From there you can upload your image and work directly from the browser, without installing anything.
The tool lets you:
- upload an image
- remove the background with one click
- download the file as a transparent PNG
Note:
Note: Canva lets you try background removal for free once, then the unlimited function is included in Canva Pro.
2. Upload your image
Inside the PNG maker page:
- Click on “Carica la tua immagine” or drag the file into the indicated area.
- Wait a few seconds for the image to be loaded in the editor.
You can use photos of:
- products
- portraits
- already exported logos
- various graphic elements
3. Remove the background with one click
Once inside the Canva editor:
- Select the image.
- Go to the “Modifica foto” section.
- Click on “Rimuovi sfondo” (Background Remover).
Canva automatically recognises the main subject (a person, an object, a logo) and deletes the background in an intelligent way.
In a few seconds you find yourself with a transparent PNG image ready to use.
4. Refine the details (optional but recommended)
If the subject is complex (hair, thin details, very small objects), it can be worth making a few retouches:
- use the “Cancella/Recupera” brush to correct zones in which:
- it has removed too much
- it has not removed enough
- enlarge the image to work better on the edges
- check especially:
- hands
- hair
- details of the objects (corners, curves, thin edges)
If you have Canva Pro you can use tools such as Magic Eraser and more advanced functions to perfect the cut-outs.
5. Export the file as a transparent PNG
When you are satisfied with the result:
- Click on “Scarica”.
- In the “Tipo di file” menu select PNG.
- Make sure the “Sfondo trasparente” option is active.
- Confirm the download.
Now you have a transparent PNG file ready to be used on:
- a website
- e-commerce
- presentations
- social
- marketing graphics
Practical examples: when a transparent PNG really makes the difference
1. A logo with a transparent background
Many companies find themselves with the logo only in a “white square” or “coloured rectangle” version.
With a transparent PNG you can:
- put the logo on the site header (light or dark)
- insert it on top of cover images
- use it in presentations, mockups, digital business cards
If you have an old logo with a background, you can:
- upload the file in Canva
- remove the background
- download it as a transparent PNG logo and use it in all your communications
2. Product photos for e-commerce
For an e-commerce, having consistent images is fundamental:
- a uniform background
- a well-visible product
- no distractions
With an online PNG maker you can:
- start from the “normal” photo
- remove the background
- put the product on a neutral colour, on a branded pattern or on a coloured background that reflects your brand
Result: the product sheet immediately seems more professional and consistent with the rest of the site.
3. Social content and fast creativity
Many social contents perform better when they are clean and readable:
- a person or a product in the foreground
- clear text
- a simple background
If you turn the main subject into a transparent PNG image, you can:
- reuse it inside different posts
- change the background every time (e.g. the colour of the day, a gradient, a texture)
- easily create graphics for:
- carousels
- reels/shorts
- video covers
4. Presentations, slides and internal materials
Also in company presentations (PowerPoint, Google Slides, Keynote) a transparent PNG is gold:
- partner logos without a background
- clean icons
- photos of people with a professional cut-out
All the material comes out more carefully made, uniform and pleasant to look at.
Tips to obtain a good result
To avoid “jagged” or imprecise PNGs, here are a few practical tips:
- Start from good-quality images
The sharper the image, the better the algorithm recognises the subject. - Choose subjects with good contrast compared with the background
For example, a person in dark clothes on a light background (or vice versa) → a cleaner recognition. - Avoid overly crowded backgrounds
If you can, already shoot with a relatively simple background: it will save you time in the cut-out phase. - Always check the edges
Zoom on the contours of the subject and check that there are no “bites” or residues of the background. - Always export in PNG
If you download in JPG, you will lose the transparency: for logos, icons, cut-out subjects → PNG all the way.
Alternatives to Canva and when to use them
Canva is convenient and accessible, but it is not the only option to remove the background:
- remove.bg: excellent for portraits and products, an API available for automation
- Photoshop / GIMP: total control over masks and complex edges
- Photopea: a free editor in the browser, PSD-compatible
- Affinity Photo: a desktop alternative with a one-off payment
For occasional and social use, Canva is enough. For e-commerce batches (hundreds of products) or very complex edges (hair, glass, fur), consider dedicated tools or a manual retouch.
Organising a transparent PNG library
Over time you will accumulate dozens of files. Avoid the chaos with a clear structure:
- Folders by type: logos, products, team, icons
- Consistent naming: brand-logo-primary.png, product-nome-variante.png
- Light and dark versions for logos on different backgrounds
- Metadata: recommended sizes, use (header, social, print) in a README
Always export at the necessary resolution: a 4000px PNG for a 48px icon wastes bandwidth and slows the site. For the web, 2x the display size is often sufficient.
Conclusion
Removing the background today is no longer a “Photoshop” job reserved for graphic designers: with the right tools you can create clean, professional PNGs in a few minutes, directly from the browser.
Whether you manage a brand, an e-commerce, a blog or simply your social, having available:
- logos in a transparent PNG
- cut-out products
- images ready to combine in different graphics
lets you make an enormous quality leap in your visual communication.
If you want to try a simple tool to create PNG images and remove the background online, you can start from here: